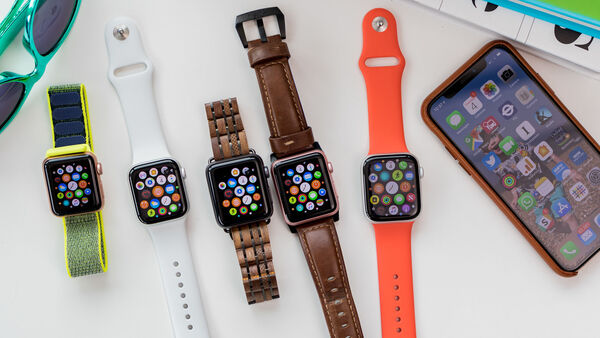
How to Change Apple Watch Band? The Only DIY Guide You Need

You can change the Apple Watch band yourself, and it is ridiculously easy. Read on to learn how to change Apple Watch band here.
Did you know that Apple sells more watches than the entire Swiss watch industry?
That's pretty amazing considering the Apple Watch was only launched in 2015.

If you're an Apple Watch owner, you might be thinking that it's time to change things up a bit and invest in a new band for your Apple Watch. If you're going to do so, you'll need to know how to change an Apple Watch band.
Read on as for our step-by-step guide to changing an Apple Watch band.
Prepare Your Working Area
First things first. You need to make sure that you have a clean and clear area to change your Apple Watch band.
The last thing you want to do is put a scratch in your Apple Watch band because you didn't take the time to prepare before changing the band. Find a large enough space to work in and clean off the surface to ensure there's nothing on there that will damage your Apple Watch.
You might want to place a microfiber cloth on the surface for good measure.
Locate The Release Buttons
Next, you'll need to locate the release buttons.
Flip your Apple Watch over. At the very top and bottom, near where the band is connected, you'll see two long and thin release buttons. These are what you'll need to use to remove your Apple Watch band.
How to Change Apple Watch Band by Holding and Sliding
Use your thumbnail or fingernail to press down on one of the release buttons.
Using your other hand, gently slide the band out of the Apple Watch. This may be a little tricky at first, you may need to give it a bit of a wiggle, but once you've got it moving, it should slide out without too much trouble. You need to make sure you keep the release button pressed down throughout.
If you're not having any luck, let go of the release button, depress it once more, and try again.
You can slide the Apple Watch band out in either direction, so go for whichever feels more comfortable to you.
Repeat
Once you've removed the first part of the band, you'll need to repeat the process for the other part.
If it makes it easier, you can rotate the watch so that the band is in the same position as when you removed the first part.
You should now have removed both parts of your Apple Watch band.
Removing A Link Bracelet
If you have an Apple Link Bracelet for your Apple Watch, the process is slightly different.
As you can only slide out one side of the link bracelet at a time, you'll need to split the bracelet into two parts first as otherwise, you won't be able to slide the bracelet out far enough to remove it.
First close the butterfly clasp on the bracelet, as you would when you are putting it on. Now locate a quick-release button on the inside of the bracelet; these will look similar to the release button on your Apple Watch itself. There are several of these buttons; pick one, it doesn't really matter which.
Hold down the quick-release button and gently pull the links apart. Your bracelet is now split into two parts, meaning you can remove each part following the same method as above.
Installing a New Apple Watch Band
Once you've removed your Apple Watch band, it's time to install the new one.
If your new band is a bracelet style or is fastened in some other fashion, make sure that the clasp is undone so that the band is in two separate parts.
Turn your Apple Watch face down, and be sure that it is the right way up. You can check by making sure that the digital crown is on the opposite side to where it usually is. You'll also want your new band to be face down too.
Now take one part of your new band. You need to be sure that you insert the top part of your band into the top of your Apple Watch and the bottom part into the bottom, otherwise, you won't be able to fasten your watch correctly. If you get the parts mixed up, don't worry; you can just remove them and start again.
Tilt the end of your band slightly so that it aligns with the groove in your Apple Watch. Slowly slide the band into the groove. You shouldn't need to force it into place. When it's in the correct position, you should feel a little click; this tells you the band is seated correctly.
Repeat the process with the second part of the Apple Watch band. Once both parts are in place, try your Apple Watch on and make sure everything is as it should be.
There you have it. Your new Apple Watch band is now installed, ready for you to show it off to the world. Give your Apple Watch a quick wipe down with a microfiber cloth as you may have left some finger marks on it when you installed your new band. Then you're ready to go.
Now You Know to Change an Apple Watch Band
Now that you know how to change an Apple Watch band all that's left is to find the perfect band.
That's where we can help. We offer a wide range of stylish Apple Watch bands, from luxury sandalwood and stainless steel bands to high-quality leather link bands.
Make your Apple Watch stand out from the crowd. Check out our best-selling Apple Watch bands today.


Leave a comment